| Software |
Windows USB Driver InstallationUSB BitScopes require the installation of a driver when first used with Windows. This usually happens automatically when you first connect your BitScope. However you may need to install the driver manually if:
You may then need to configure the software to use the correct COM Port. To optimize performance in Windows we recommend reducing the driver latency. For more information about all this, read below or click through these links:
Of course, email us anytime at support@bitscope.com if you need assistance! Automatic Driver InstallationIn most cases, there is nothing to do, just plug in the BitScope. The following pop-up should appear at the bottom right of the desktop. 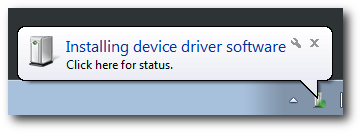
Its appearance may differ a little depending on the edition and version of Windows 7 or 8 you are using (The remainder of this tutorial uses Windows 7) To observe progress click the pop-up dialog to reveal: 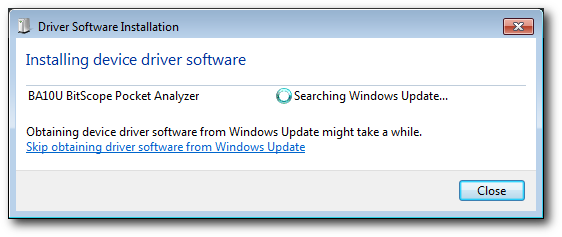
When the installation completes you will see: 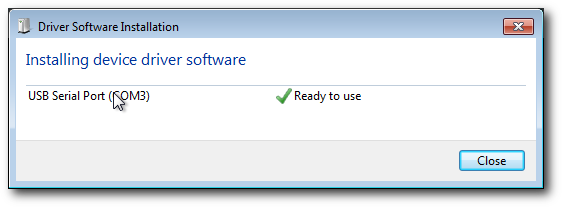
Take note of the COM Port identifier (COM3 in this example) as you may need it later. Manual Driver InstallationIf the automatic installer failed you may see this: 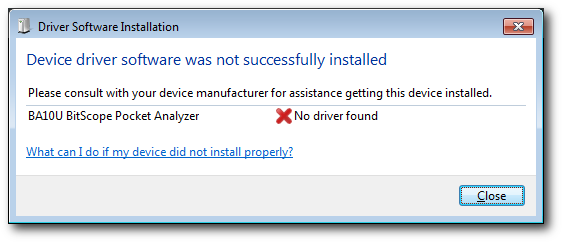
In this case you will need to UNPLUG YOUR BITSCOPE and download the driver: 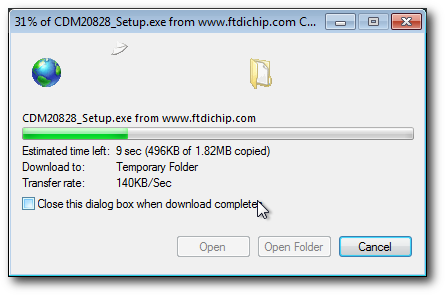
and when complete, run it: 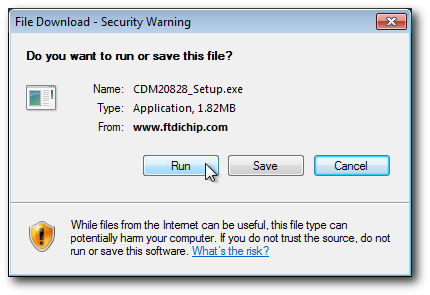
You will be asked to extract it: 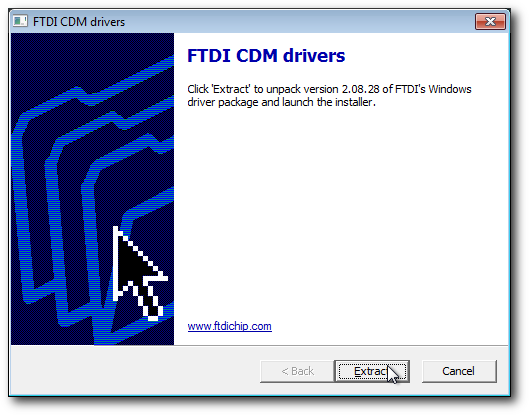
and then install it: 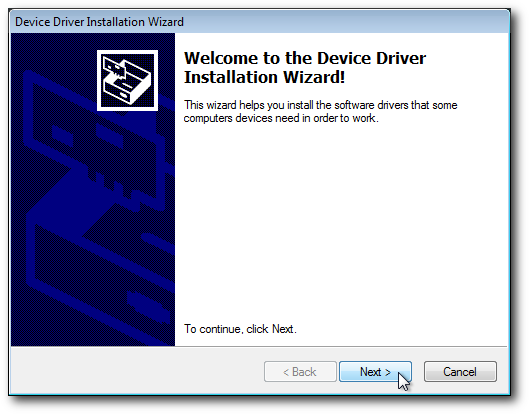
which may take some time to complete: 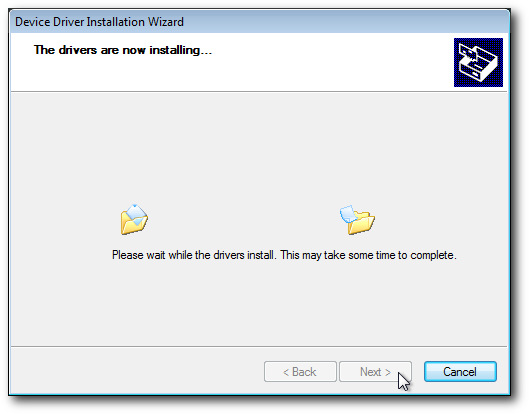
When the installation is complete you may see this dialog:
Take note of the COM Port identifier (COM3 in this example) as you may need it later. Which COM Port was assigned?Sometimes it's necessary to learn the device properties for a USB BitScope. The most common reason is to see the COM Port number Windows has assigned when the driver was installed (if you forgot to take note of it at the time). Select Devices and Printers: 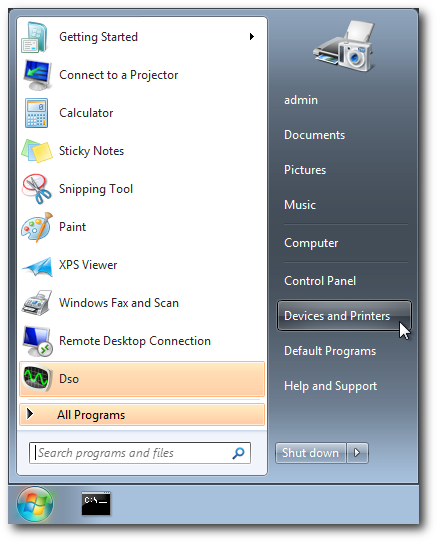
Find the BitScope (it should be listed) and select properties: 
and then select the Hardware Tab: 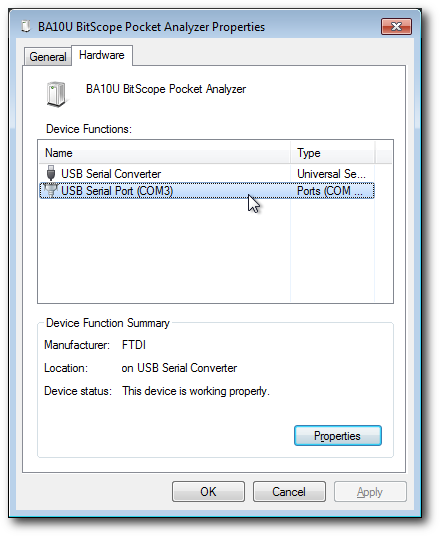
Here you can see the COM Port number (COM3 in this example). Choosing the COM PortIf only one USB BitScope is connected choosing the COM Port is unecessary All BitScope Applications automatically connect with that one BitScope. However, if more than one BitScope is connected or there are other FTDI COM Port devices connected to your PC (e.g. a serial mouse), you may need to configure the software to use the correct COM Port. This can be done with most BitScope Apps. With DSO click SETUP: 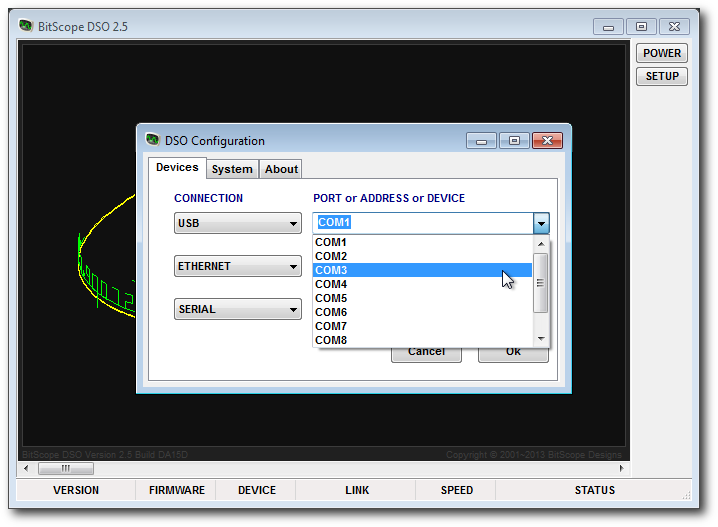
and choose the correct COM Port (COM3 in this example) and Click OK: 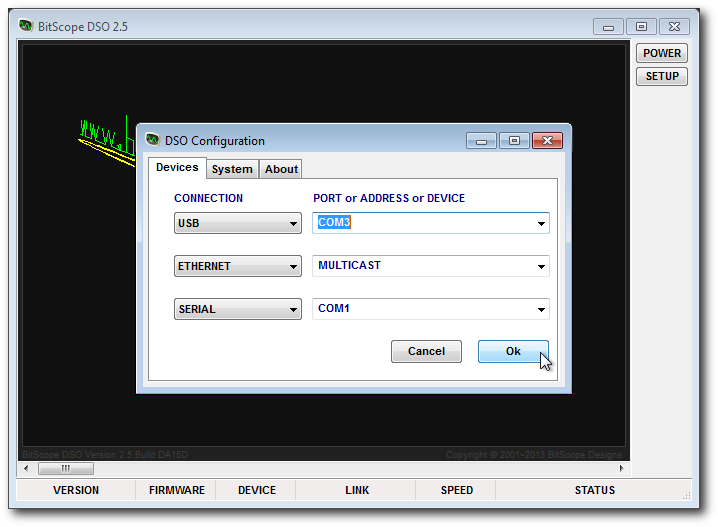
Doing this with one BitScope Application sets the port used for all applications so you won't need to do this again. In the case of DSO, click POWER to start the application: 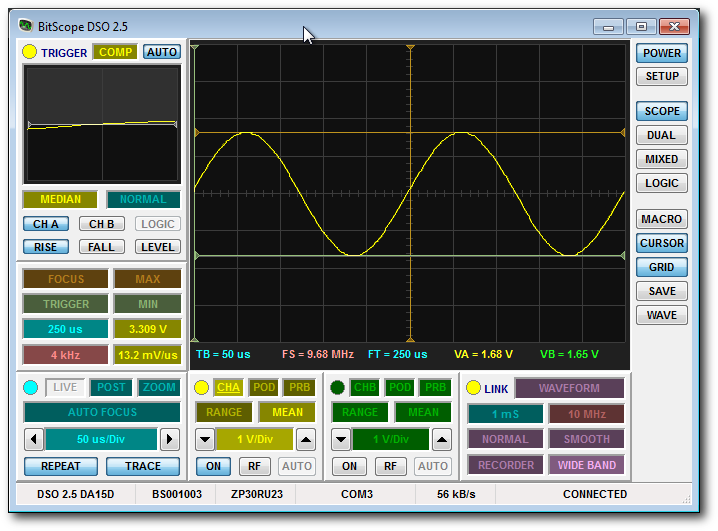
Note that COM3 is reported at the bottom of the application. If the selected COM Port does not appear here, you are not connected to your BitScope (troubleshooting). Window Device ManagerWindows may throw up a roadblock when trying to view the COM port or adjust the device properties when accessed the more direct way. In this case you may need to use Device Manager to access the device properties. First select the Computer Properties: 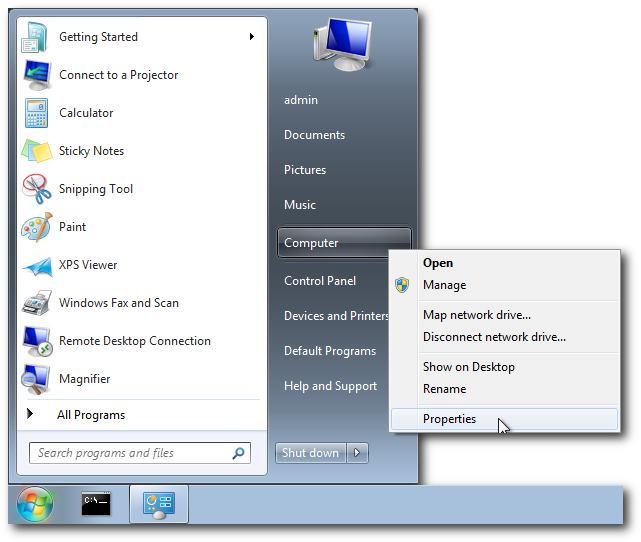
and then choose the Device Manager: 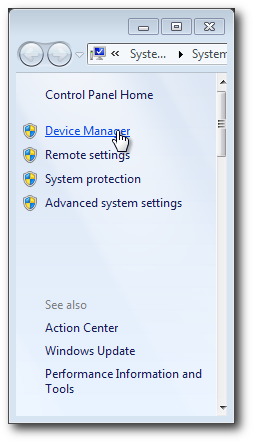
From the Device Manager, find the USB Serial Port: 
(which is COM3 in this example) and right-click to open the device properties:
Reducing Device LatencyBitScope prefers the shortest USB latency to achieve the highest performance. 
Unfortunately Windows 7 & 8 install the driver with a long latency by default. Reduce the latency value to significantly improve performance when talking to a USB BitScope with Windows 7 or 8. After installing the USB driver, select the device properties and then choose the properties for the COM port assigned to your BitScope (COM3 in this example): 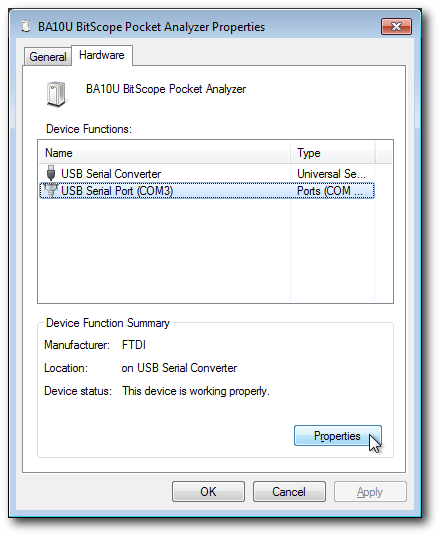
Select the Port Settings tab and click Advanced: 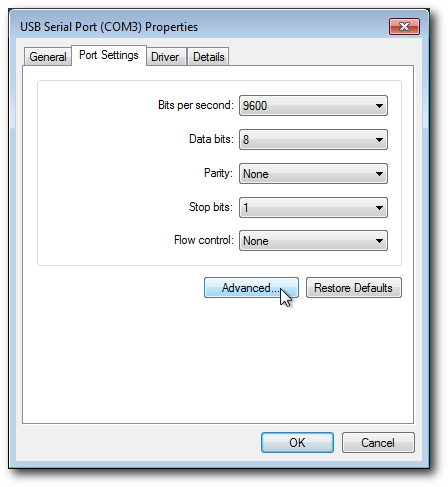
At this point you may be told: 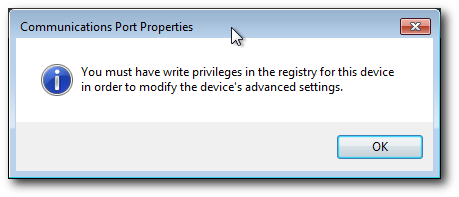
If so, you will need to access the Port Settings tab via the Device Manager instead (this is due to a bug in many editions of Windows 7 and 8). Whether you've used Device Manager or this route you should then see: 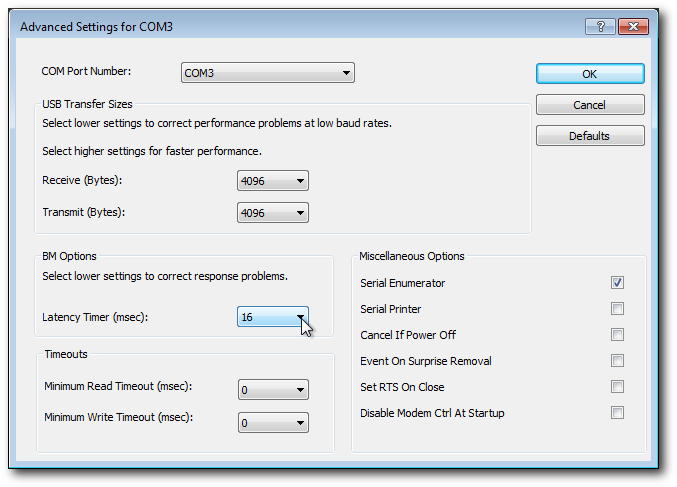
Change the default latency (16 ms) to 1 ms: 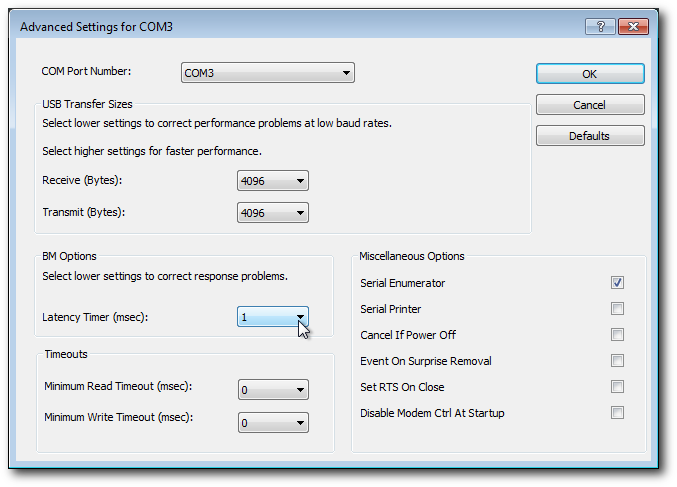
Click OK to accept the new value. You may then need to restart Windows for the new value to take effect. Troubleshooting USB ConnectionsIf you have successfully installed the driver but still you cannot connect:
If you can connect but there are still problems:
If you still have problems, especially if you are upgrading from older software versions, the configuration files used by the application software may have been corrupted. The file most likely to cause problems (if corrupt) is the probe file. The Local Probe File (details)On Windows 7 & 8 the local probe file is located at: C:\Users\<user>\AppData\Local\BitScope\BitScope.prb or on older versions of Windows: C:\Documents and Settings\<user>\Local Settings\Application Data\BitScope\ BitScope.prb where <user> is your logged in user name on your PC. Delete this file to force the software to recreate it with correct information. The Global Probe File (details)There is another globally configurable probe file. This is unlikely to be corrupt but if you suspect it is, and you have adminstrator privileges on your PC to modify it, you can delete (or comment out) its contents (don't delete the file itself). It is highly unlikely you will need to do this but we mention it here as a last resort. None of this works for you? Email us at support@bitscope.com for assistance! |
Copyright © 2023 BitScope Designs


